electronics

This is just a quick list of notes and links looking at cheap Chinese laser cutters and possible uses


Materials:

Acrylic

Cardboard

Leather

Denim

Felt

MDF

Chipboard

Sugar

Rubber

Paper – books

Glass?

craft foam

Mirror (back)

rocks

sponges

beans


Materials to Avoid:

Vinyl – PVC

Kydex

ABS


Project Ideas :

Superhero masks

Catan

Stencils

Stickers?

Inlays

Comic prints

instrument panels

Plant tags

Stamps

Gloves

Holster

Topo Maps

Tokens

Records

cut pipes

name tags

license plate covers

Vacuum Former


https://www.ebay.com/itm/152532418116?ul_noapp=true

https://www.ebay.com/itm/Water-Break-Protection-40W-CO2-Laser-Engraver-Crafts-Cutter-w-Panel-Control/162448714948?hash=item25d2b2acc4:g:vWQAAOSwTM5Y2ysr

https://fslaser.com/Products/Lasers

https://www.aliexpress.com/item/4060-Laser-Engraving-600-400mm-50W-Co2-Laser-Cutting-Machine-with-Honeycomb-Specifical-for-Plywood-Acrylic/32728471493.html?spm=2114.10010108.1000013.1.12091572wP2NcW&traffic_analysisId=recommend_2088_1_90158_iswistore&scm=1007.13339.90158.0&pvid=8047e5a3-de46-465c-af61-8f9edf7a9602&tpp=1

http://en.voiernlaser.com/index.html

salewang@voiernlaser.com

https://lightburnsoftware.com

Buy Mini Gerbil K40 Controller

https://cncpro.yurl.ch/

http://svgnest.com/
KeychainWhen I was doing my CFL Teardown I mentioned that I thought the PCB would make a cool keychain. It does. I have had it on my keys for a little while now and it works quite well at helping me find my keys without getting in the way. I like the side with the components silkscreened on, most people like the green side with the traces.
keychainTo make it work as a keychain I had to widen out one of the holes to fit the key ring through. There are a ton of ways to do this, but I happened to have my Yankee Drill sitting on my counter as I was working, so I used that. Next I wanted to take off the excess solder so all the holes would be visible. I was feeling lazy so instead of using a solder sucker I just used solder wick. Once I was happy with the amount of solder I had left I put the keychain in my toaster oven to round off any sharp bits of solder that were left over. This made the board a bit discolored, but it also kept me from cutting myself when pulling my keys from my pocket.

After a few weeks using it the only problem I see is that I am slowly wearing the hole larger. I figure that in a few months I will wear completely through. I could cover the whole thing in a clear epoxy and it would probably last much longer. Probably I will just take apart another broken CFL and use the PCB again.


One of my compact fluorescent lights stopped working recently. Instead of throwing it away I decided to crack it open and see what was inside.
<warning> Electricity can hurt you. If you don’t know what you are doing, get someone who does to help. </warning>

The first step was to remove the metal base and pry the plastic off of the globe. The plastic base, globe and lamp were disposed of. Be careful with the lamp, it contains mercury vapor, not something you want to be breathing.

The main circuit board. Everything was pretty tightly packed in. At first glance nothing is obviously bad. The plastic on the enclosure was a little browned, so I’m guessing something overheated. One part of the large yellow inductor was cracked when I removed it, so that is a possibility.
After a little time with the soldering iron I’ve got a nice pile of parts. I got six diodes, seven capacitors (two matching), five resistors (two matching), three inductors, two matching transistors, a fuse and a nifty circular pcb. Normally I would dispose of the pcb but I think it would make a really cool looking key chain.
Now all I need to do is check the parts that might be bad and put them away in my parts drawer.

Look what I got in the mail. I should really order things for myself more often.

The box was easily large enough to ship a full sized LCD. I reused the bubble wrap to ship my burned out Dremel in for repair.
The replacement screen, it looks exactly the same. So far so good.
All fixed up. All the screws went back into the right places, even the stickers and rubber bumpers went back. And I’ve even upgraded the software to boot. It’s like a brand new machine.


Recently Ive been looking into options for 3D rapid prototyping. There are two main categories, additive and subtractive. Additive involves depositing a liquid material that hardens, subtractive involves cutting out of a preexisting object. A few years ago the only options were tens to hundreds of thousands of dollars, and required specialized software and knowledge to operate. Now thanks to the open hardware movement there are more options available, and for less money. Read on for my initial investigation into what is available.

Cupcake CNC 3D printer $725 basic kit $950 deluxe kit
http://www.makerbot.com/
Fireball V90 CNC router $889 basic kit $1199 deluxe assembled
http://www.probotix.com/
Lumen Labs micRo CNC router $699 micRo Premium $999 micRo Gold
http://lumenlab.com/
Versa Laser/Epilog ~$8000-$15,000 and up
http://www.epiloglaser.com/ http://www.ulsinc.com/versalaser/
Rep Rap No complete kits available
http://reprap.org/
Fab@Home $3700 fully assembled $2750 Kit (on sale)
http://fabathome.org/

A while ago the screen on my EEE PC 701 was cracked.

I decided it was time to look into getting a replacement.
To find out what kind of replacement screen I needed I had to open it up.
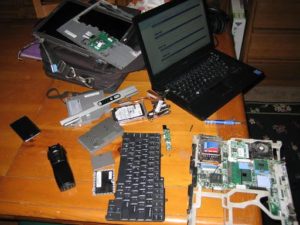
After removing the screws from the screen I realized I would have to take the bottom plastic off as well to get to the screen.I removed the battery and six screws on the bottom. Not even close to done.
After removing the keyboard, another batch of screws and the touchpad I was in.

Sure enough on the back of the LCD there is the model number I needed to get a replacement. Since I hadn’t ever ripped apart an LCD I went ahead and did so, there were several sheets of plastic, glass and the display all squeezed into that tiny case.
I ended up ordering a replacement screen off ebay for $68.67 new. I’ll post an update when it comes in.

A while ago I went on a cruise down to the Caribbean. There I saw a unique solution to an everyday problem. How do you plug an American (NEMA 5-15) power plug into a non-American receptacle (L6-15)?
Simple:
bent prongs
You just bend the prongs. Or..Cut the plug off all together and just shove the wires in.And here is the rest of it.